Some programmers might consider the Vim learning curve1 quite steep, and they’d be correct. However, I think that the upfront time investment is totally worth it.
Once you’ve memorised a handful of basic instructions, you can start to compose them together into more complex actions. Actions that are more complex than any non-modal text editor could allow.
Also, coworkers are completely startled when they watch you do your job without a mouse. Switch to a light theme and you’re all set to become the company’s 10X rockstar genius developer!
As of the time of writing, Neovim is the only editor I use.
If modal text editors really “click” for you, then you’ll naturally go searching for ways to customise them to your own personal taste. Read on to learn about my personal Neovim config. And before you ask, the answer is: no, I haven’t figured out how to exit yet. Nobody has.
Favorite Theme
Let’s start with syntax highlighting.
Actually, you might not even call it “highlighting” at this point, because I use a monochrome color scheme. It’s literally shades of grey. For my config, I’m using Endarkened Mono.
While it does have a multi-colour mode, I prefer using monochrome. It turns out I actually don’t need many colours to read code, I just used to think I did because that’s how it was always displayed.
I use light mode as well. Before you flip the table, I have a good reason for it: I don’t wear glasses at my desk and a light theme is a lot more readable than a dark theme.

Screenshot of iterm2 running Neovim with endarkened mono colour theme
Useful Plugins
Asynchronous Linting Engine (ALE)
ALE is my hackable linter of choice. The best part about ALE is that it can be integrated with language servers via Language Server Protocol. This exposes LSP code actions, useful for code generation and refactoring.
In addition to language servers, ALE integrates with command line tools as well. Currently, I’m using it with phpactor, phpcbf, phpcs and eslint.
The project is open source and you can submit a pull request on GitHub to add your own linters, something I have done for a couple of PHP linters I wanted to use.
Use ALE with Deoplete to add code completion functionality.
Fugitive
Fugitive is the #1 git plugin for Vim, and it really is “so awesome it should be illegal”. You get the productivity of a TUI without having to open another tmux2 window or iTerm2 tab3.
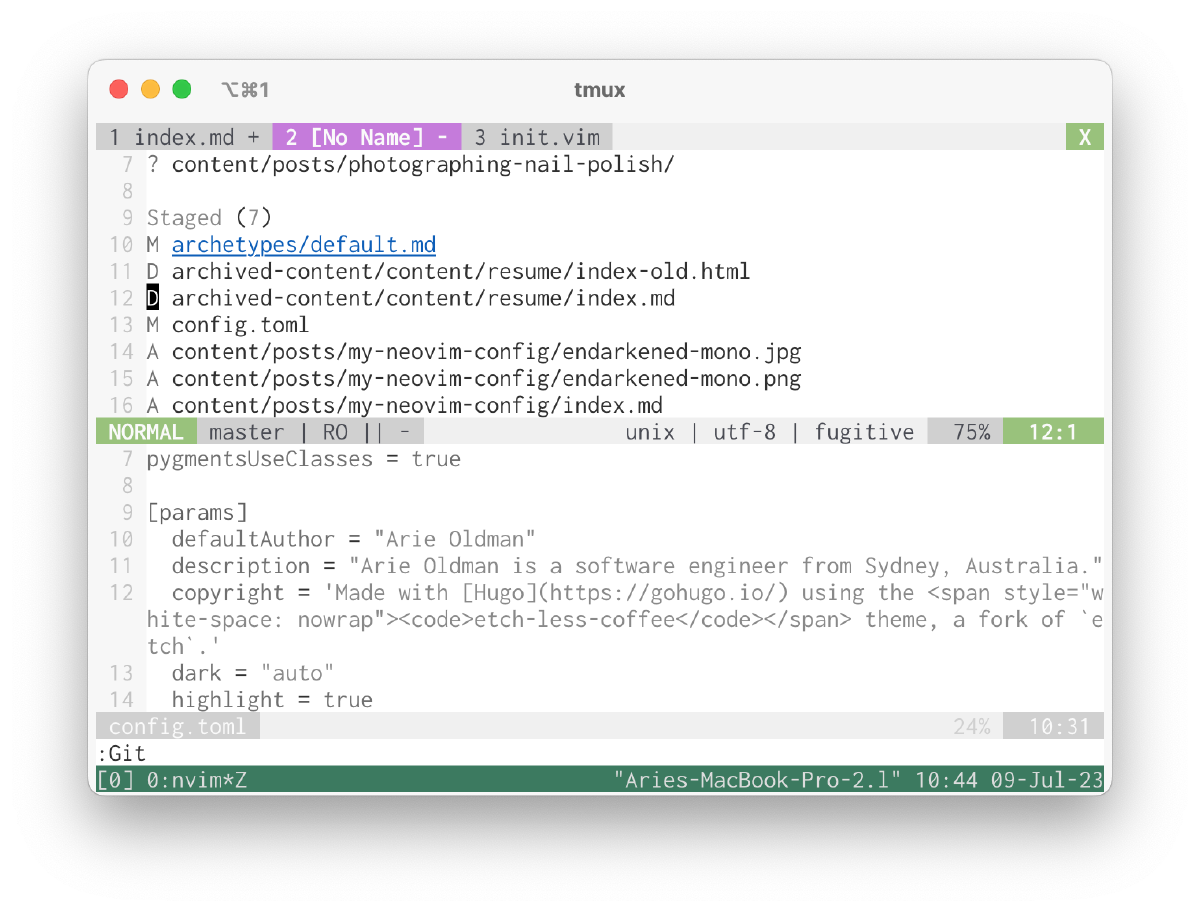
screenshot of Neovim with a fugitive window open at the top
Fugitive is a lot faster to use than the git command line. Open a Fugitive window with :Git, use the arrow keys to navigate. Press s to do git add and press cc to commit.
You can view a file in diff view as well. Press dd and you get:
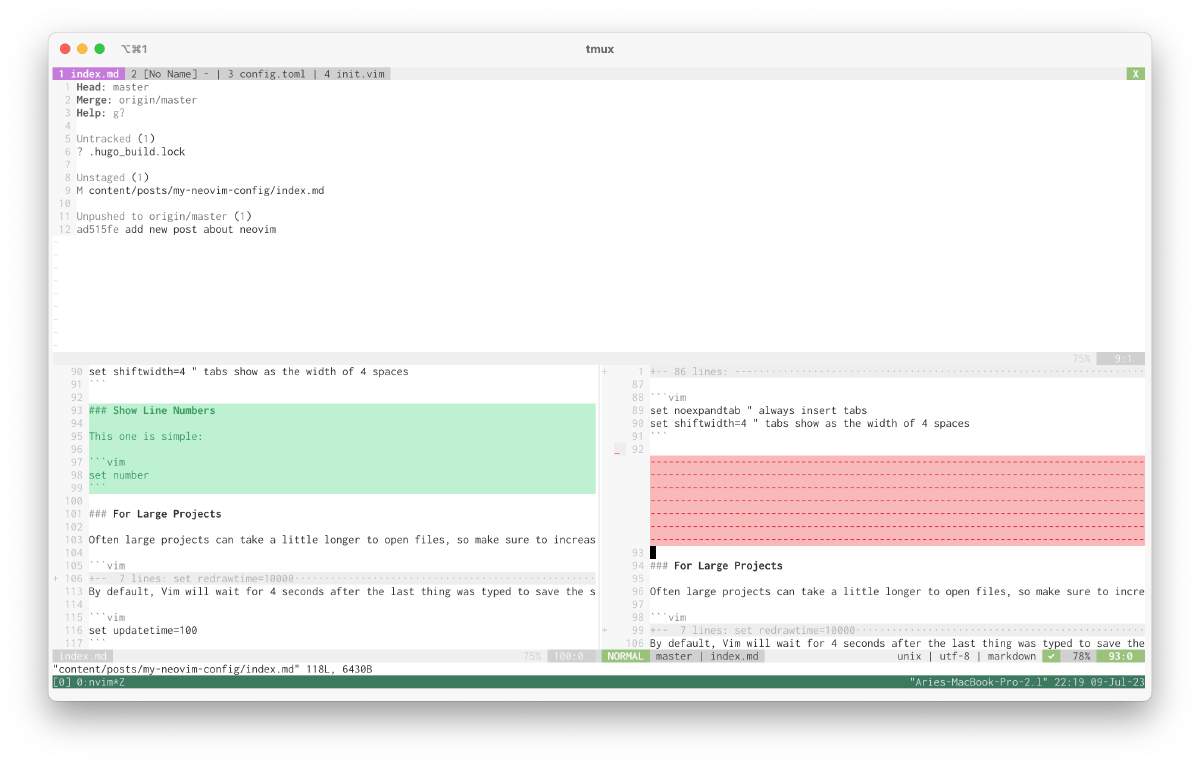
screenshot of large neovim window showing the fugitive window at the top, and a diff view below
Because it’s a git client inside of Vim, you can chain commands together. For example, you can git add more than one file at a time while not adding all files: 3s (git add 3 times).
Once the commits are made, you can push them with s.
The :Git command also doubles as a proxy to git, so you can easily git add the current file with the command :Git add %.
NvimTree
NvimTree is a Neovim plugin to give you a file browser within your editor. Excellent for getting a birds-eye view of the project directory, and it can be hidden when you want more screen space. This one is a quality-of-life improvement.
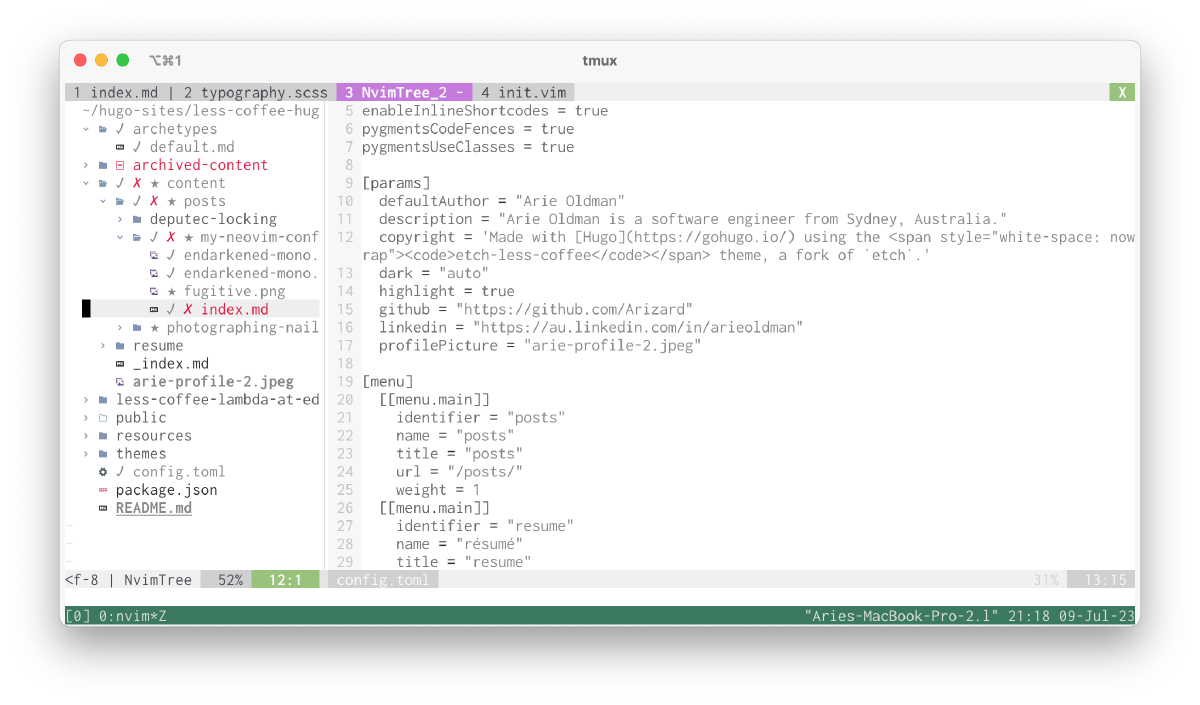
screenshot of neovim with nvimtree open on the left hand side
FZF
All programmers will gain a productivity boost when they have a way to search their project. Pretty much every IDE has a search feature. FZF is a plugin that adds these search features into Vim. Use :FZF to fuzzy-find files by name. If you have ag (The Silver Searcher) or rg (ripgrep) then FZF integrates with these to give you full text search capability. Incredibly useful.
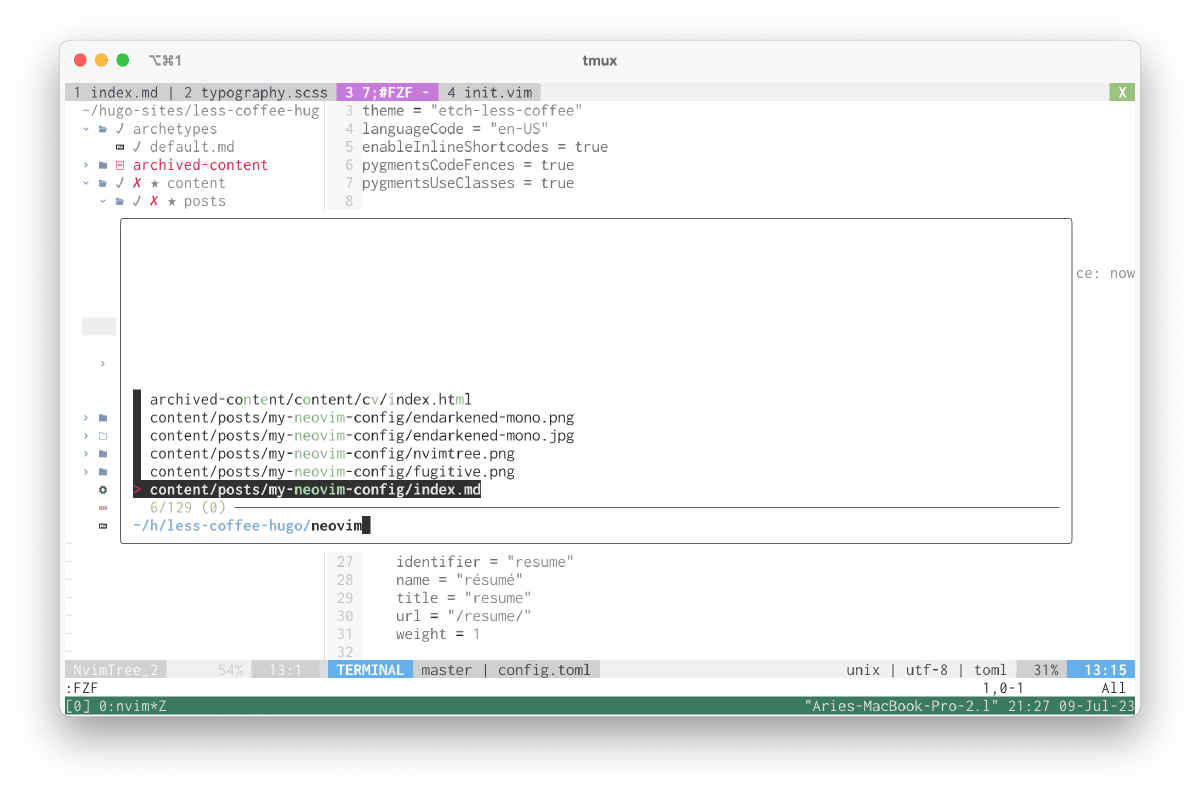
screenshot of neovim with FZF modal open, searching for “neovim”
Useful Configs
Tabs and Spaces
Whether you prefer tabs, spaces, 2-wide or 4-wide, you can have it your way in Vim.
Use 2 spaces per indent:
set expandtab " when you press Tab, insert spaces matching the tab 'size' (tabstop)
set tabstop=2 " convert one Tab character into 2 space characters
Use tabs as indent, 4 spaces wide:
set noexpandtab " always insert tabs
set shiftwidth=4 " tabs show as the width of 4 spaces
Show Line Numbers
This one is simple:
set number
For Large Projects
Often large projects can take a little longer to open files, so make sure to increase the timeout:
set redrawtime=10000
This is useful for files that are well over 20K LOC, which I have the misfortune of working on every now and then.
Crash Recovery
By default, Vim will wait for 4 seconds after the last thing was typed to save the swap file (a file used as a backup for crash recovery). You might want to decrease this timeout, especially if your hardware has no trouble with it. I’ve got mine set to 1/10th of a second:
set updatetime=100
Project-specific Config
If you have some project-specific configs, you can define them in a project.vim file, stored in the project directory. To include this config on Vim startup, add the line:
silent! so project.vim
Final Words
This is not an exhaustive list of all the configs and plugins I am using right now. If you want to look at that, see my init.vim file here.
We programmers are builders, and we’re only as good as our mastery over our tools. Vim is a tool that pays dividends when mastered.
It was educational for me to write this article because I had to double check what some of these plugins and configs do. I hope this article gave you a better idea of how I do my job. Thanks for reading!