Lately I’ve been experimenting with analog photography. I grew up in the 2000s, so my exposure to film was extremely limited (except for some very faint memories of using a disposable camera on holiday, and then taking it to the post office for development). Read on to hear about my journey so far, starting with my first analog camera.
This post was titled “Yashica Electro 35”, but I need to give context first. I’ll get to that in a few paragraphs.
How it started
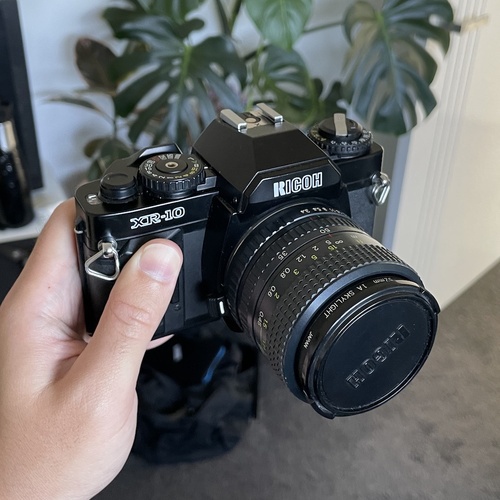
Last year, while browsing my local Vinnies (an Australian thrift store/charity organisation) I found a Ricoh XR-10 with a Rikenon 35-70mm lens for only A$20. At the time, I had no idea if it worked, but since it was dirt cheap I took a chance on it. I learned to replace light seals, ordered a new battery, and filled a roll of film with “test shots” (just me snapping whatever I was doing that week).
A bargain? We’ll see.
I was quite pleased with the condition of the lens. The body at first appeared to also be in good condition. At one point, the winding lever was jammed. I removed the bottom cover and found strange brown crumbs lodged in one of the mechanical components. I cleared it out and the lever worked again. Not sure what that was. Maybe I don’t want to know.
According to the manual that I found online, there was meant to be some kind of shutter speed indicator inside the viewfinder. There was not, which meant that I could not see the light meter reading, however the light meter still seems to work! Not a problem, I can rely on the sunny 16 rule or aperture priority. Take a look at the test shots:
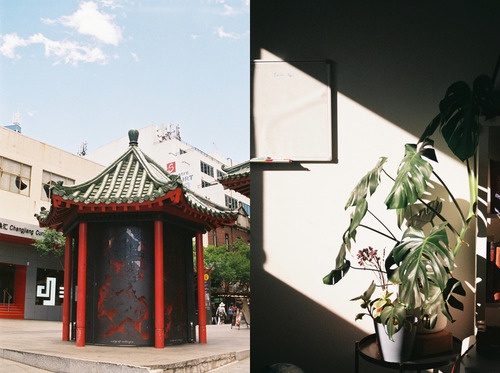
Left to right: Chinatown, Monstera with morning sunlight masked by a window. Fujifilm Superia C200. Click to view larger size.

Top to bottom: Goat at petting zoo, Pugs on sofa in filtered sunlight. Fujifilm Superia C200. Click to view larger size.
For the most part, the photos look pretty good! It’s evident that there is some light leaks still happening (as seen in the goat photo). Okay, so maybe I’m not a professional light seal repairer, but I think I did a fairly good job!
Getting back into it
Fast forward to August of this year, and I’m in a bit of a creative slump. Work projects have been challenging and I’m looking for creative outlets. At this point I have been photographing my partner’s nail art for about a year, and it is no longer creatively fulfilling.
I was drawn back to analog photography for a few reasons:
- It was a challenge. Often you are working with vintage equipment, without in-body image stabilisation, matrix metering or electronic viewfinder. The photographer must rely on not only their technical knowledge, but also their ability to pre-visualise an exposure. It forces you to pre-visualise.
- The anticipation of receiving your developed photos, and having no way to review the exposures until you’ve got the scans back. This way, we get used to shooting without reviewing every photo every time. It builds confidence.
- I have more money. Student debt is paid off (woohoo!) so I can more comfortably buy rolls of film and get them developed (I don’t have a home development kit yet).
Why analog?
In our digital age, we are too quick to tear apart our own photos: I don’t like this, I don’t like that, he’s looking the wrong way, her chin is too low, etc. We frustrate ourselves trying to get the “perfect” shot, and we punish ourselves by being our own harsh critics. We take the same photo over and over, trying to “fix” the shot, all the while ignoring the subject in front of us. Ever been to a family dinner where mum’s never happy with how she looks on her iPhone camera?
Don’t forget: when we take photos, it’s often about saving a memory for later. That “film aesthetic” everyone talks about? It’s not just color or grain, it’s authenticity! With film, you set the scene and then you take the shot. You can’t review it for another few days at the least. Take the shot, move on and enjoy the moment.
The Yashica Electro 35 GSN
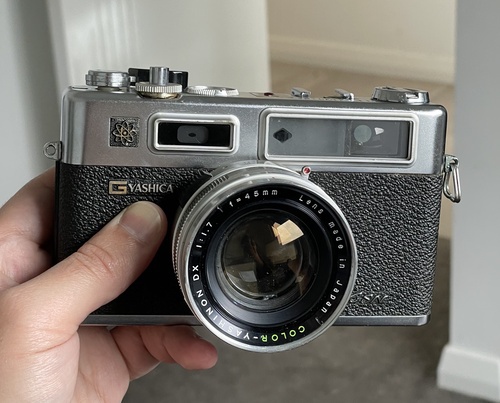
The Electro 35 GSN right after I bought it.
The Yashica Electro 35 was a line of rangefinder cameras manufactured by Yashica in the early 1970s. They feature a 45mm f/1.7 unit-focusing fixed lens, aperture priority automatic shutter speed, and a cadmium sulfide (CdS) photoresistor.
On Facebook marketplace, one will find that there are plenty of individuals selling vintage cameras (in Sydney at least). I was lucky enough to find a listing for the Yashica Electro 35 GSN in my own suburb, for A$100.
Vintage Yashica Electro 35 GSN (not sure if working) - $100
Despite there being no evidence whatsoever that this camera was in working condition, I took a chance on it. This camera is quite famous, having 8 million units manufactured, and was supposed to have some pretty high quality glass too. I had heard of “range finder” cameras before, and thought it would be a nice change from my usual SLR-shaped cameras.
I’ve replaced light seals before, if it’s broken, surely it’s not that hard to repair!
The Electro 35 takes a mercury battery which is no longer legal to manufacture (for good reason). Luckily this unit actually included the after-market battery adapter, which takes a 4LR44 battery (or 4x LR44 stacked together – requires some adapter adjustment). It’s literally a piece of plastic pipe with an aluminium cylinder wedged into one end.
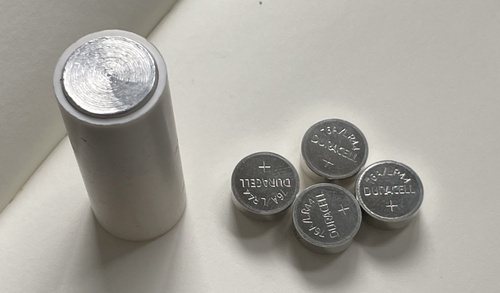
4LR44 battery adapter.
Fortunately, LR44 batteries are available at the supermarket, in packs of 4. I loaded the batteries in, and it worked! I could see the “battery test” light come on in the frame counter!
After replacing the light seals, I thought I was good to go. I loaded up some Fujifilm Superia C200 that I had in the fridge.
The Electro 35 has two warning lights on the body (and visible in the viewfinder). Orange SLOW light means the shutter speed will be slower than 1/30, therefore recommending not to shoot hand-held. Red OVER light means the shutter speed required for the scene exceeds the maximum speed the camera can provide (1/500). These two lights will prompt the user to adjust the aperture until the lights turn off.
The lights are supposed to come on while pressing the shutter. I remember thinking that the OVER light comes on with a half-press of the shutter release, but the SLOW light requires a really deep press of the shutter release, almost all the way down. I thought it was just a quirk of the design.
Unfortunately, I had loaded the film at this point, and I didn’t think I could take it out (later I learned that you can do this quite safely in complete darkness, but I didn’t think of it at the time).
I took a few test shots. Sometimes, the shutter would be stuck in the open position if I accidentally released the shutter while the SLOW or OVER lights were on (easy to do, since the SLOW light required an almost full press, and the OVER light only activates in the top 1/4th of the release actuation distance).
Another problem I discovered by accident was that in bulb mode, letting go of the shutter release did not close the shutter.
To close the shutter in these cases, I lightly turned the winding lever to force the shutter closed.
I concluded that this unit had the pad of death problem, which would cause the aforementioned symptoms, among others such as inconsistent shutter timing.
I shot the rest of the roll anyway to see what would happen.
Some shots came out surprisingly clear, while others looked awful and washed out for some reason.

These shots came out really nice, in my opinion. View full size
These ones, not so good. Maybe it was the overcast sky? Or the shutter got stuck? Maybe daylight balanced film just looks like that? View full size
Fixing the Pad-of-Death
The pad of death (POD) refers to a small rubber pad which sits between two metal components which control the Electro’s leaf shutter mechanism. The purpose is to add space while also dampening any impact between the two components. Originally this rubber pad was actually more foam-like, and I’m told it was similar to the foam used in the original light seals. As I know by now, light seals do not last 50 years (probably not even 10 years). The pad of death disintegrates and crumbles away over time.
While repair manuals do exist for the Electro 35, they are only useful for disassembly, adjustment and calibration. There are no instructions on fixing the pad of death.
A youtube video I found shows the process of removing the front cover (including the attached lens) by removing the top cover and (gasp!) peeling off the textured fake-leathery cover to access some hidden screws! I really did not want to do that, but thankfully one of the youtube commenters came through for me:

“Great video explaining the POD issue. Definitely an overkill though … taking the top off, clean and scrape off the old pad with isopropyl … "
So apparently, I could access the space that the pad should be, without peeling apart glued bits?
More searching led me to Yashica Guy’s repair guides where he confirms that POD can cause incorrect shutter speeds, problems using bulb, auto, or flash modes. He also had this to say:
Although some people have had some success with removing the bad pad and replacing it by simply removing the camera top plate, which does make it visible through a space at the top left front, I consider this akin to micro-surgery.
How hard could it be? After all, it’s not brain surgery… just micro-surgery?
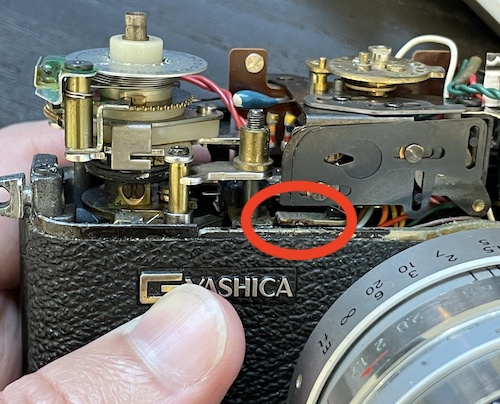
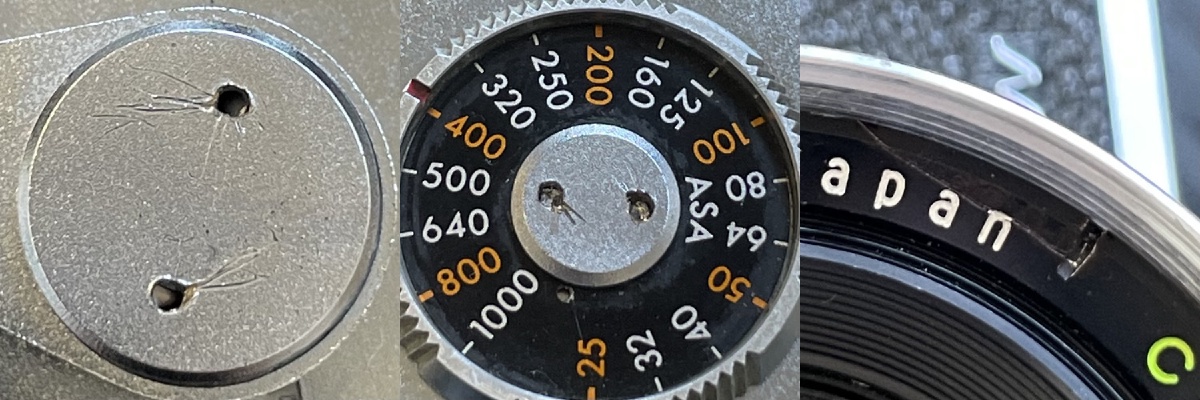
The old pad of death. It turned to dust with minimal scraping. It’s on the underside of that horizontal metal plate.
It was a bit trickier than expected, but I managed.
I had ordered a tool kit from Jaycar for this exact purpose. I’m not sponsored but this kit is awesome. It had everything I needed (except for a very specific tool called a watch spanner which would have made it easier to unscrew the winding lever and ASA adjustment).
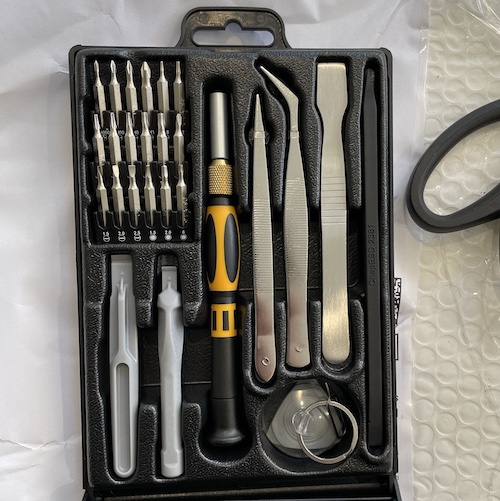
The angled tweezers were really useful
I was able to scrape out the old gunk using Pointy Black Stick (name I just made up for one of the tools) and isopropyl alcohol (loosens the glue).
Now to replace the pad with something.
Since apparently the pad used to be made of the same stuff as the light seals, I tried adding light seal foam in there. This didn’t work, because modern light seal foam is more porous and less firm, so it basically did nothing.
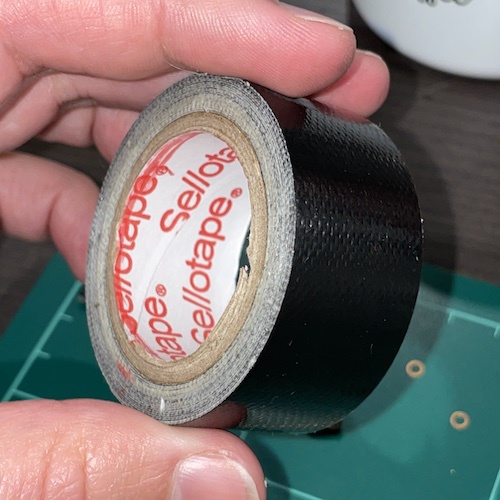
The Youtube commenter before said he used double-sided tape with one side still covered, but I didn’t have any of that on hand. Instead, I saw a passing Flickr comment where a user said that the used electrical tape layered to the desired thickness. So I took the closest thing to electrical tape I had and layered away.

This was a PITA to get in.
According to Yashica Guy, the pad needs to be about 4x5mm with 2mm thickness. When I tried this, it was too thick, so I actually used closer to 1mm thickness. This may be because Yashica Guy used a neoprene washer, which compresses more under load, while the tape I used is less elastic and more firm.
To ensure the adhesive made contact, all I had to do was press the shutter release button down, and that pushes the tape sandwich together.
I then adjusted the transport release rod and stroke rod, repeatedly testing the Bulb mode to make sure that the shutter would open and close with the movement of the shutter release. This took some tweaking, I spent 15-20 minutes doing this.
After that, just a few more repairs: gluing the SLOW and OVER light covers back on to the top cover, adjusting the position of the warning lights, and slipping a tiny piece of tape in between the two lights to prevent them from spilling into each other. I just used super glue (contact adhesive) for this part.
Finally, after putting it all back together, I had an operational Yashica Electro 35, and an elevated sense of self worth.
Repair Summary
I used the following tools and materials:
- Precision phillips head screwdriver (it was labelled
PH00) - Angled tweezers and straight tweezers
- Black cloth/electric tape to create a pad with some elasticity
- Ruler/vernier calipers to measure the dimensions of the new pad
- Box cutter to cut the tape to size
- Cutting mat to protect the desk!
Results after fixing the Pad of Death
After the fix, there were no more issues with the shutter getting stuck. The warning lights are activated with much less shutter release actuation, which makes it easier to test exposure before taking the shot.
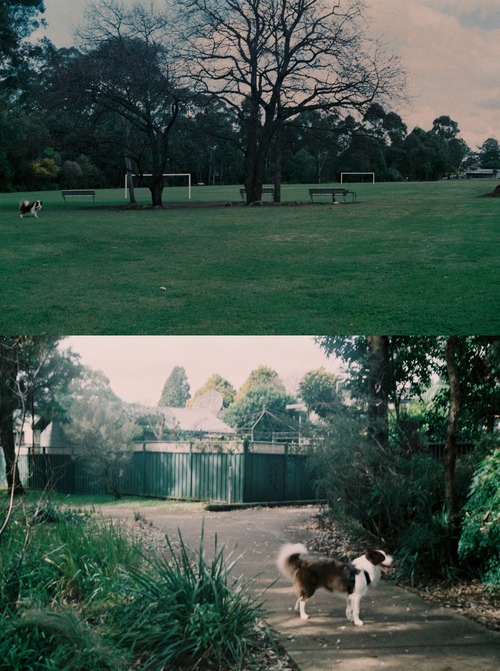
I loaded up some Ilford HP5+, here are some shots:

Scanned these using my A7iii and a makeshift light box. View full size
Final notes
Overall, I’m really happy with the camera. It feels solid and weighty in the hands, and the leaf shutter is whisper-quiet. The glass is excellent and fast as well.
There is a unique appeal to how mechanical everything is. For example, while the Ricoh has excellent build quality, the shutter release button uses a rubber membrane to close a circuit inside the top cover. The Electro 35 has a mechanical release rod, you can feel all the components moving into place when you take a picture.
When taking a photo with a slow shutter, you can actually hear a capacitor charging up right before the shutter closes. I think this capacitor must power a solenoid or something, to “unlock” the shutter so it can close? The experience is a new one for me.
And how could anybody fault the stylish atom badge? It was literally “the style at the time” and symbolised “electronic control” in early electronic cameras.
You know, considering that the pad of death was completely deteriorated, I would have assumed the camera body had never been taken off. However, I also see scratches and other cosmetic damage on the ASA dial, winding lever and lens front plate. Maybe a past owner had attempted to access the pad of death, only to find that they couldn’t get the top cover off? I guess I’ll never know.